
How a Russian Salt Producer Turned a ppline Bulk Bagging Area Into a Clean Flow From Filling to Palletizing
For a Russian salt producer, the problem was not only bagging speed. The real bottleneck was the distance between the filling point, the transfer conveyor, and the pallet zone. The ppline bulk bagging line answers that problem by keeping the flow visible, guided, and physically separated from the traffic around it.
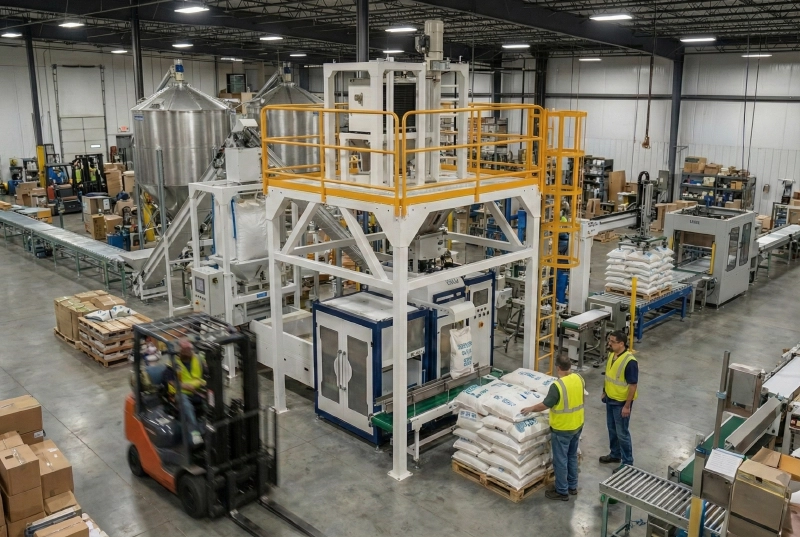
When bulk sacks move through a loosely arranged area, operators start compensating for the layout. Bags get re-aligned by hand, forklifts cut through the same corridor, and the last meters before palletizing become a stop-and-go zone. Output looks fine on paper, but the line loses rhythm on the floor.
Why the ppline layout fits this exact scenario
The ppline line is built around a steel tower, a guided discharge path, and a transfer zone that is easy to read from the operator side. In the field photos, the QZK-1200 station sits high enough to keep the packaging area clear, while the conveyor route carries sacks away without forcing extra turns or manual lifts. That matters for bulk products because every extra turn creates a chance for bag swing, label damage, or product spill.
For the salt producer, this meant the packaging point could stay focused on filling, while the downstream flow handled the bag transfer and the pallet rhythm as one connected sequence. The machine area becomes easier to supervise, but it also becomes easier to maintain because the access path is not buried under the product flow.
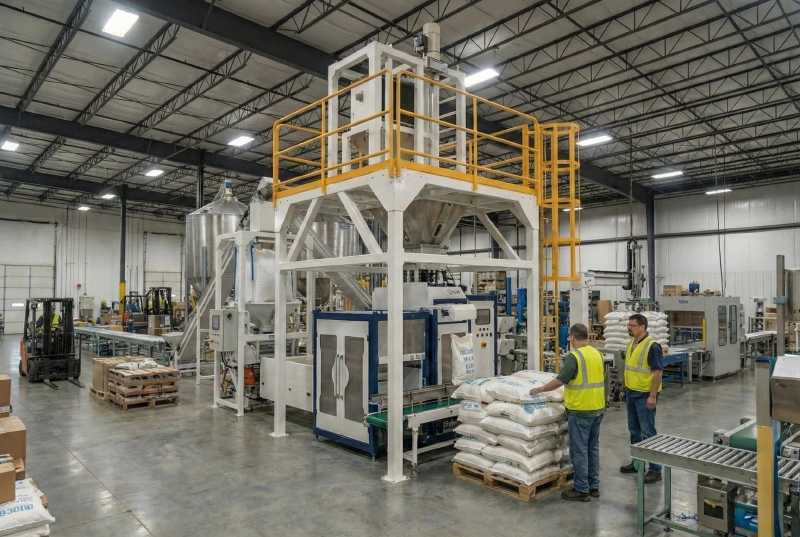
BPM Engineering Insight: On a bulk bagging line, the fastest way to create more throughput is often not a faster filling head. It is a cleaner handoff between the filling point, the guided outfeed, and the palletizing zone. Once the handoff is stable, the line stops wasting time on correction moves.
What the structure is doing at each step
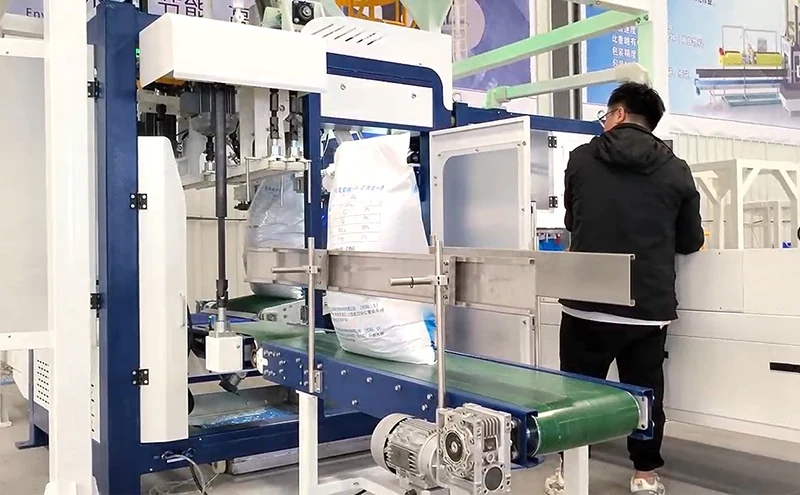
The structure evidence is visible in the image set. The CAD view shows a modular arrangement with an accumulation belt, a bag gripper, and a discharge conveyor. The close-up assembly view shows the clamping and bottom support logic that keeps the sack aligned before it leaves the station. The operational photo confirms the same idea in real production: the sack is not wandering through the line; it is being guided through it.
This is why the line suits bulk products rather than only one narrow material. Salt, grain, and other free-flowing materials all punish unstable transfer points. If the bag orientation changes too early, the rest of the process starts fighting gravity, not using it.
| Old problem | ppline response | Result on the floor |
|---|---|---|
| Bag swing and re-handling after filling | Guided outfeed conveyor with a fixed transfer path | Cleaner movement from the filling point to the pallet zone |
| Cross-traffic around the machine | Elevated steel tower and separated operating lane | Less interference from people, forklifts, and moving sacks |
| Unstable bag alignment before discharge | Bag clamping and bottom support assembly | More consistent sack position and fewer correction steps |
What the CAD views prove before the machine is even running
The technical drawings are not decoration. They show how the line is built to keep the bag path predictable. The modular layout puts the accumulation belt, bag gripper, and discharge conveyor in a straight logic chain, which is exactly what a bulk products line needs when the goal is stable transfer instead of random handovers. The bag clamp and bottom support detail adds another layer of control right where sacks normally begin to deform.
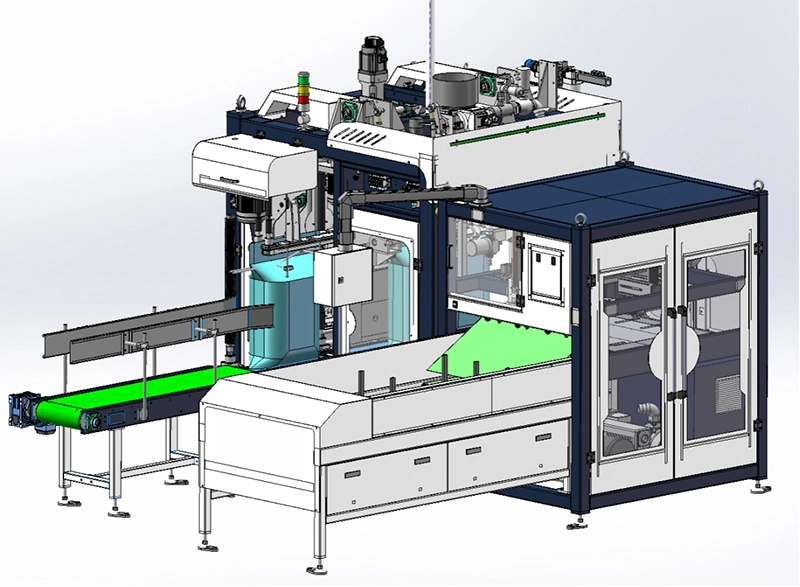
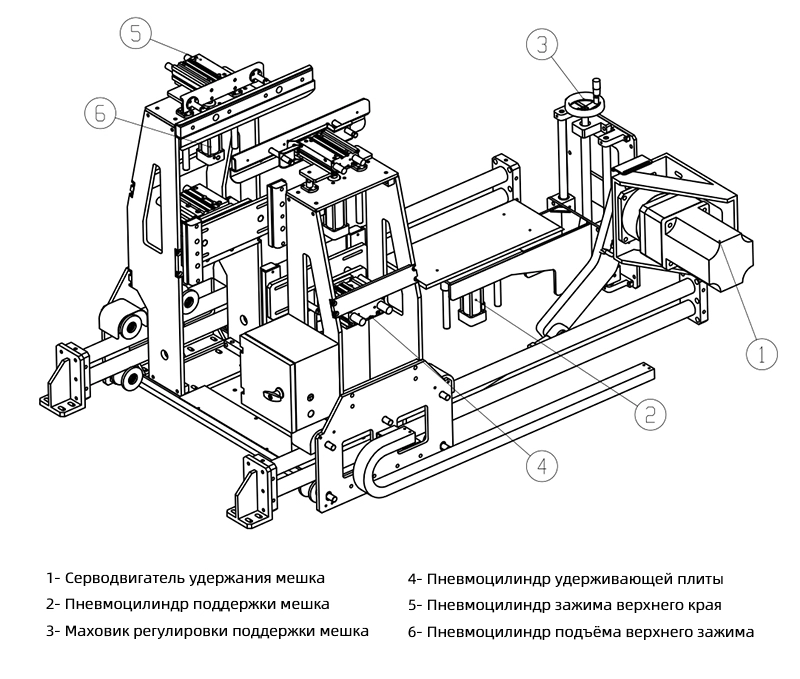
For a salt producer, that detail translates into less guesswork during daily operation. The operator can see where the bag enters, how it is held, how it exits, and where it should land next. That visibility reduces hesitation, and reducing hesitation is often what keeps a line from becoming a bottleneck.
FAQ
Why does the transfer zone matter so much on a bulk bagging line?
Because the transfer zone is where the process either becomes continuous or turns into a series of corrections. If that area is guided well, the downstream pallet work stays predictable.
Why is the elevated tower useful for a salt producer?
It keeps the machine structure above the traffic path, improves access for maintenance, and helps separate packaging motion from forklift movement and manual sorting.
If you need a bulk bagging layout that keeps filling, transfer, and palletizing in one clean flow, ask for a ppline line review before the next bottleneck shows up on the floor.
Request a layout review English
 Русский